ROC-RK3568-PC
本文档介绍如何在 ROC-RK3568-PC 开发板上启动和验证 AxVisor 项目,涵盖多种部署场景:
- AxVisor + Linux 客户机:在虚拟化环境中运行 Linux 系统
- AxVisor + ArceOS 客户机:在虚拟化环境中运行 ArceOS 系统
- AxVisor + 多客户机:同时运行多个不同类型的客户机系统
快速体验:如果您不想自己编译构建,我们也提供了预构建的固件镜像,可以直接下载体验。请访问AxVisor 官方网站获取适用于 ROC-RK3568-PC 的预构建固件,并直接跳转到烧录到开发板章节
开发环境
AxVisor 及 ROC-RK3568-PC 的 SDK 仅支持在 Linux 系统中进行开发。本文档基于 Ubuntu 24.04 系统验证,其他 Linux 发行版可能需要相应调整。
系统要求
- Linux 操作系统
- Git 工具
- Rust 工具链(用于编译 AxVisor)
- 基本的 Linux 命令行操作能力
注意:ROC-RK3568-PC 的 SDK 对 Python 环境有特殊要求,详见后续章节。
构建准备
准备 AxVisor 源码
首先,使用 git clone 命令获取 AxVisor 的源代码并创建工作目录:
git clone https://github.com/arceos-hypervisor/axvisor.git
cd axvisor
# 创建工作�目录
mkdir -p tmp/{configs,images}
准备设备树文件
设备树文件可以通过在开发板上运行 Linux 系统导出,也可以下载项目提供的设备树文件使用。
项目提供的 Linux 镜像文件夹中包含设备树文件,可直接下载到 tmp/images 目录:
# 下载包含设备树的 Linux 镜像
cargo xtask image download roc-rk3568-pc_linux --output-dir tmp/images
准备客户机镜像
AxVisor 项目提供了预构建的客户机镜像,方便用户快速验证和体验功能。通过 cargo xtask image 命令可以方便地管理这些镜像。
# 下载 ArceOS 客户机镜像
cargo xtask image download roc-rk3568-pc_arceos --output-dir tmp/images

# 下载 Linux 客户机镜像
cargo xtask image download roc-rk3568-pc_linux --output-dir tmp/images

# 列出所有可用镜像
cargo xtask image ls
AxVisor 所支持的客户机镜像的构建脚本和构建产物可以在 axvisor-guest 仓库中找到。
部署到开发板
部署方式概述
AxVisor 支持两种客户机加载方式:内存加载部署(编译时将客户机镜像打包进 AxVisor 二进制文件,��启动时自动从内存加载)和文件系统加载部署(客户机镜像存放在开发板文件系统中,运行时动态从文件系统加载)。本文档采用文件系统加载部署方式进行介绍。
在此部署方式下,客户机配置文件需设置 image_location = "fs",.build.toml 中的 vm_configs 字段设置为空数组 [],并启用文件系统相关特性。
重要说明:由于瑞芯微提供的 SDK 对整个部署方式进行了预定义,难以实现自定义部署方式,因此我们通过构建后编辑瑞芯微原生镜像的方式来实现部署。整个部署操作要求在 ROC-RK3568-PC 的 SDK 目录中执行相关命令,以便直接使用 SDK 生成的各种镜像和工具。
部署步骤
一、前期准备
1. 准备客户机配置文件
复制客户机配置文件模板到工作目录:
# 复制 ArceOS 客户机配置文件
cp configs/vms/arceos-aarch64-rk3568-smp1.toml tmp/configs/

# 复制 Linux 客户机配置文件
cp configs/vms/linux-aarch64-rk3568-smp1.toml tmp/configs/
修改客户机配置文件,设置为文件系统加载模式:
# 修改 ArceOS 客户机配置
sed -i 's|image_location = ".*"|image_location = "fs"|g' tmp/configs/arceos-aarch64-rk3568-smp1.toml
sed -i "s|kernel_path = \".*\"|kernel_path = \"/guest/images/arceos.bin\"|g" tmp/configs/arceos-aarch64-rk3568-smp1.toml

# 修改 Linux 客户机配置
sed -i 's|image_location = ".*"|image_location = "fs"|g' tmp/configs/linux-aarch64-rk3568-smp1.toml
sed -i "s|kernel_path = \".*\"|kernel_path = \"/guest/images/linux.bin\"|g" tmp/configs/linux-aarch64-rk3568-smp1.toml
2. 配置构建文件
使用 cargo xtask defconfig roc-rk3568-pc 命令设置 ROC-RK3568-PC 为默认构建配置:
cargo xtask defconfig roc-rk3568-pc
然后修改 .build.toml 文件,启用文件系统相关特性:
# 在 features 数组中添加文件系统相关特性
sed -i '/^features = \[/,/^\]/c\
features = [\
    "fs",\
    "axstd/ext4fs",\
    "driver/rk3568-clk",\
    "driver/sdmmc",\
    "dyn-plat",\
    "axstd/bus-mmio",\
]' .build.toml
或者手动编辑 .build.toml 文件,将 features 字段修改为:
features = [
    "fs",
    "axstd/ext4fs",
    "driver/rk3568-clk",
    "driver/sdmmc",
    "dyn-plat",
    "axstd/bus-mmio",
]
注意: 文件系统加载模式下,vm_configs 保持为空数组 [],不需要指定客户机配置文件。
3. 编译 AxVisor
编译 AxVisor:
cargo xtask build
编译完成后,AxVisor 镜像位于 target/aarch64-unknown-none-softfloat/release/axvisor.bin。
4. 获取 ROC-RK3568-PC SDK
由于没有完善的构建框架,我们套用原有的构建 Linux 内容来生成镜像。根据 ROC-RK3568-PC 开发板官方文档,构建 AxVisor 的镜像。
下载的 SDK 实际上是由 repo 工具管理的一个仓库源码压缩包及相关说明文档,需要解压后使用 repo 命令恢复 SDK 内容。
二、构建 SDK
1. 解压和配置 SDK
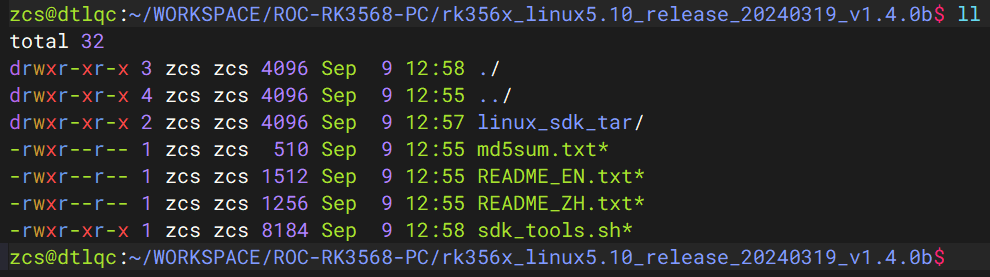
解压 SDK 仓库
# 给脚本执行权限
chmod +x ./sdk_tools.sh

# 创建 SDK 目录
mkdir ../firefly_rk3568_sdk

# 解压 SDK 仓库压缩包
./sdk_tools.sh --unpack -C ../firefly_rk3568_sdk
解压后只有一个 .repo 文件夹,需要进一步恢复 SDK 内容:

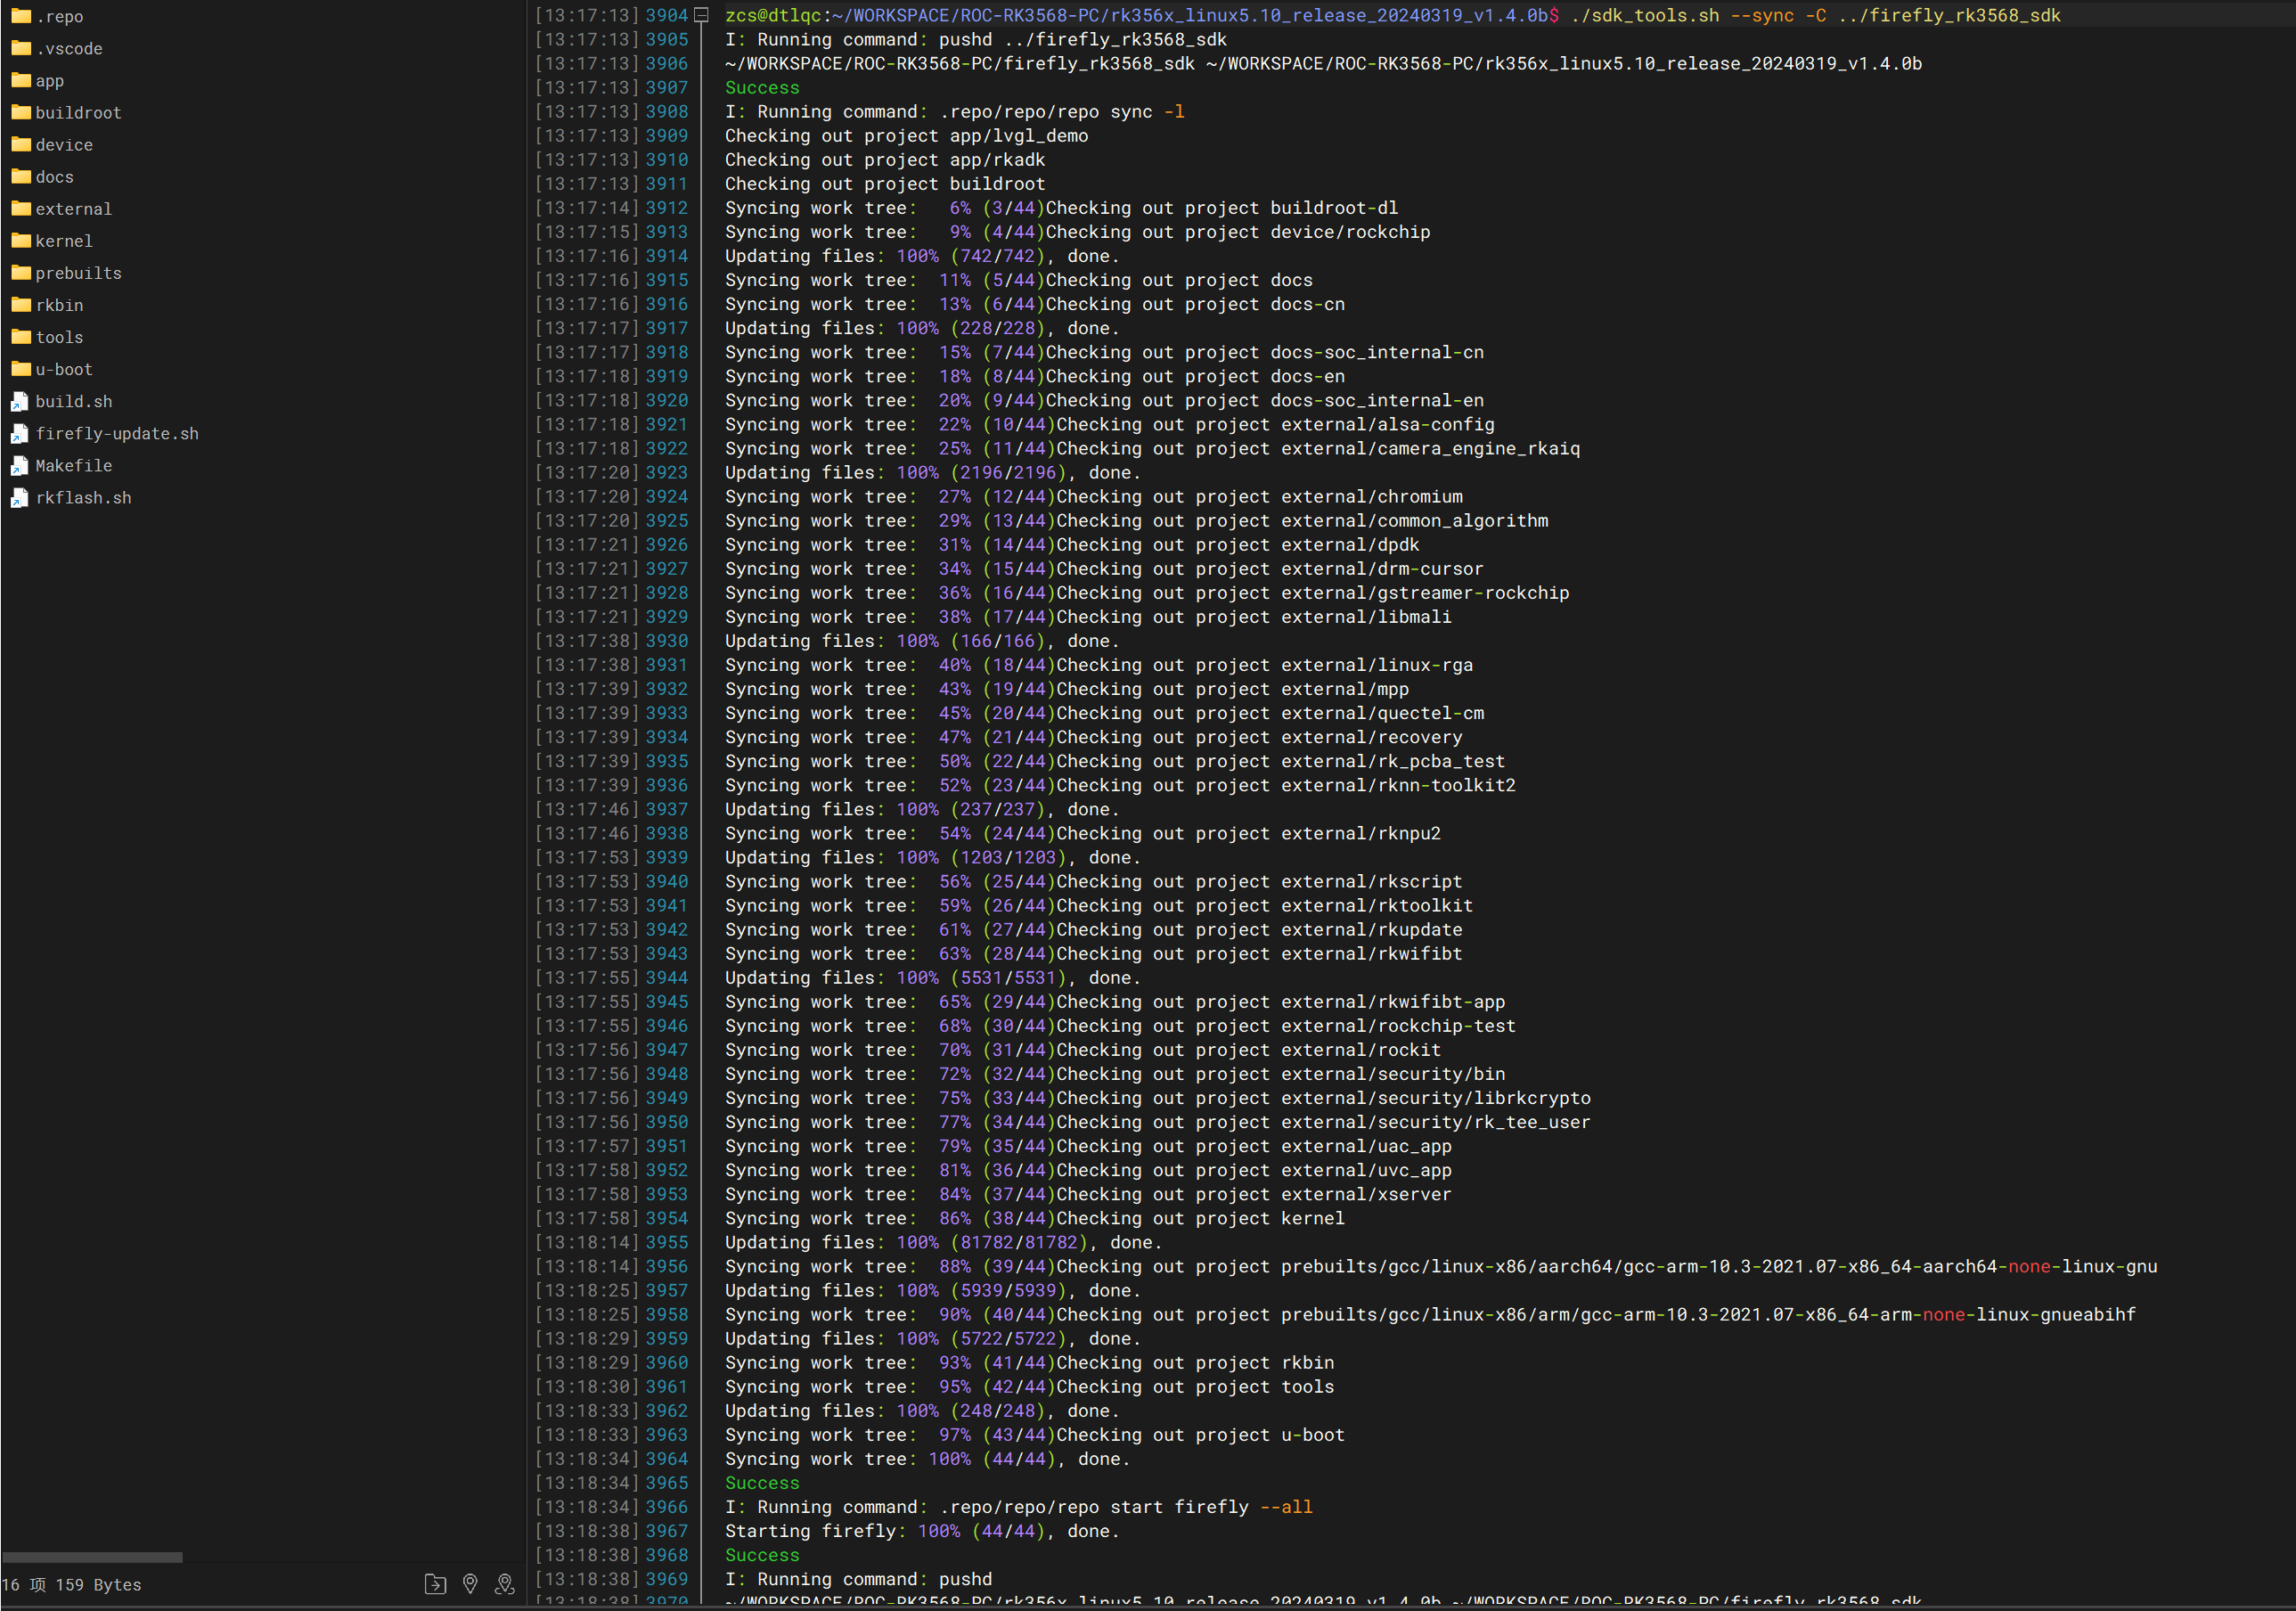
恢复 SDK 内容
# 方法一:使用工具脚本
./sdk_tools.sh --sync -C ../firefly_rk3568_sdk

# 方法二:手动执行(推荐)
cd ../firefly_rk3568_sdk
.repo/repo/repo sync -l
.repo/repo/repo start firefly --all
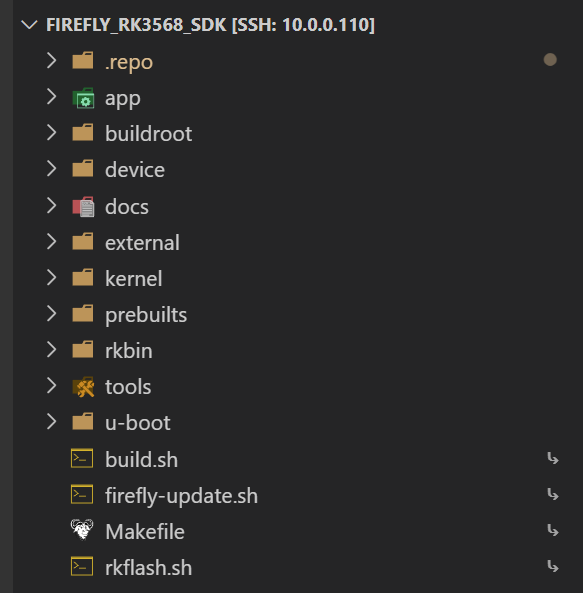
恢复后的 SDK 内容:
Python 环境兼容性修复
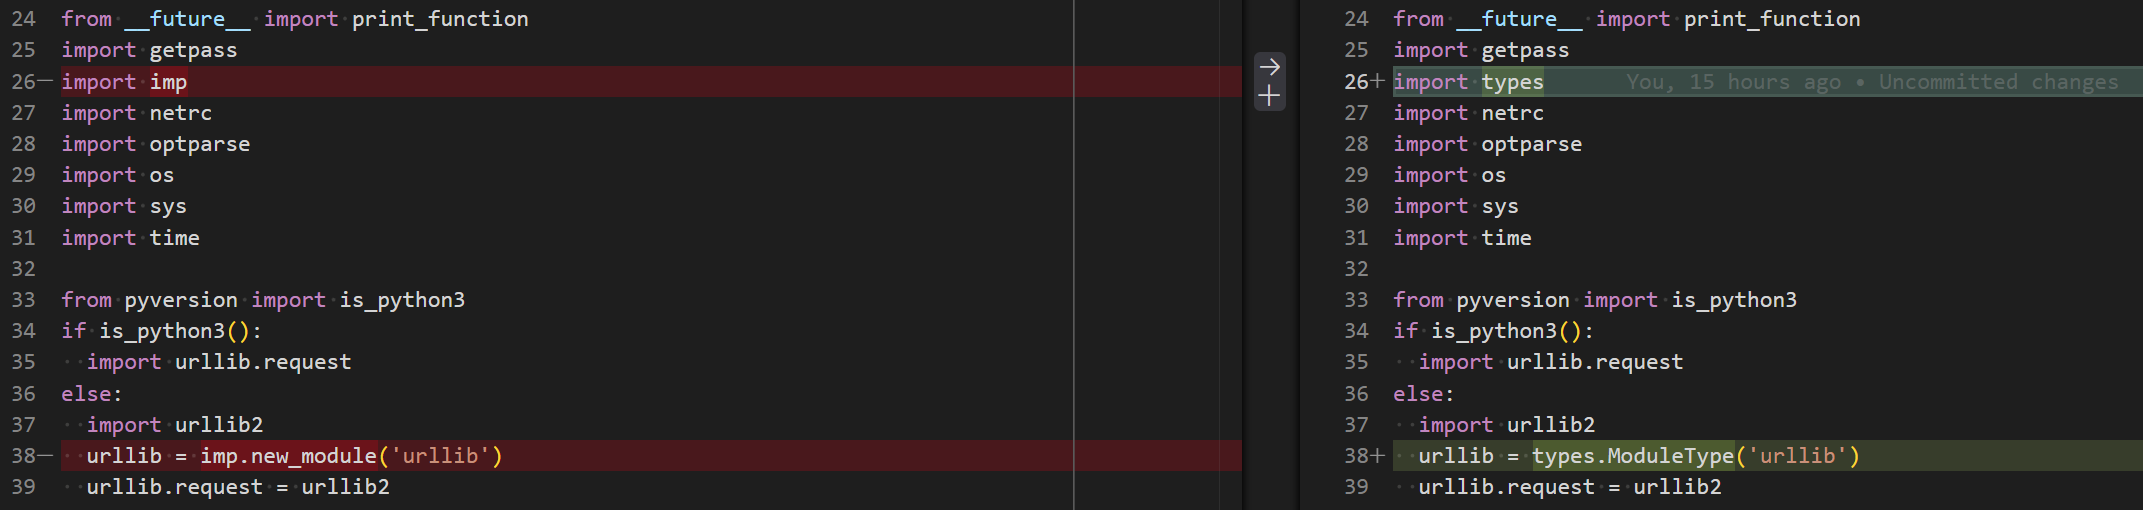
如果当前构建环境 Python 版本是 3.12 及以上,需要修复 SDK 中的 repo 工具兼容性:
- 修改
../firefly_rk3568_sdk/.repo/repo/main.py中的imp相关��代码(Python 3.12 中已删除) - 新建
.repo/repo/formatter.py文件(参考Code中的完整代码)

注意:上述修复只需要执行一次,后续更新可在
firefly_rk3568_sdk目录中执行.repo/repo/repo sync -c --no-tags
SDK 恢复完成后,build.sh 就是构建入口。
2. 移植适配和构建准备
Python 环境适配
ROC-RK3568-PC 的 SDK 对 Python 环境有特殊要求,需要进行适配修复。
U-Boot 构建修复
修改 u-boot/make.sh 中的 Python2 检测代码:
说明:U-Boot 源码中还有大量基于 Python2 的脚本文件,但在默认构建中不会使用到,因此无需进一步修改。
3. 安装构建依赖
首先安装 SDK 构建所需的依赖工具包:
sudo apt install git ssh make gcc libssl-dev liblz4-tool expect expect-dev \
    g++ patchelf chrpath gawk texinfo chrpath diffstat binfmt-support \
    qemu-user-static live-build bison flex fakeroot cmake gcc-multilib \
    g++-multilib unzip device-tree-compiler ncurses-dev \
    libgucharmap-2-90-dev bzip2 expat cpp-aarch64-linux-gnu \
    libgmp-dev libmpc-dev bc python-is-python3
注意:如果使用 Python2 环境,则不要安装
python-is-python3这个包。
4. 准备 Rootfs 镜像(可选)
如果选择构建 Ubuntu 的 rootfs(在下一步配置文件时选择),则需要先下载预编译��的 Ubuntu 镜像。SDK 不支持从源码构建 rootfs。
下载步骤:
-
访问 Firefly 官方下载页面,从提供的网盘中下载任意一个 rootfs 镜像,例如
Ubuntu20.04-xxx_RK3568_KERNEL-5.10_xxx.7z -
解压镜像到 SDK 根目录的
prebuilt_rootfs文件夹(需自行创建):
# 创建目录
mkdir -p <SDK_PATH>/prebuilt_rootfs

# 解压并重命名
7z x Ubuntu20.04-xxx_RK3568_KERNEL-5.10_xxx.7z
# 将解压后的镜像移动并重命名为 rk356x_ubuntu_rootfs.img
mv <解压后的文件> <SDK_PATH>/prebuilt_rootfs/rk356x_ubuntu_rootfs.img
5. 执行 SDK 构建
执行 ./build.sh 开始构建,根据需要选择对应的配置:
cd <SDK_PATH>
./build.sh
在配置选择界面中,选择以下配置之一:
| 配置名称 | 编号 | 说明 |
|---|---|---|
firefly_rk3568_roc-rk3568-pc_ubuntu_defconfig | 30 | Ubuntu rootfs |
firefly_rk3568_roc-rk3568-pc_buildroot_defconfig | 31 | Buildroot rootfs |
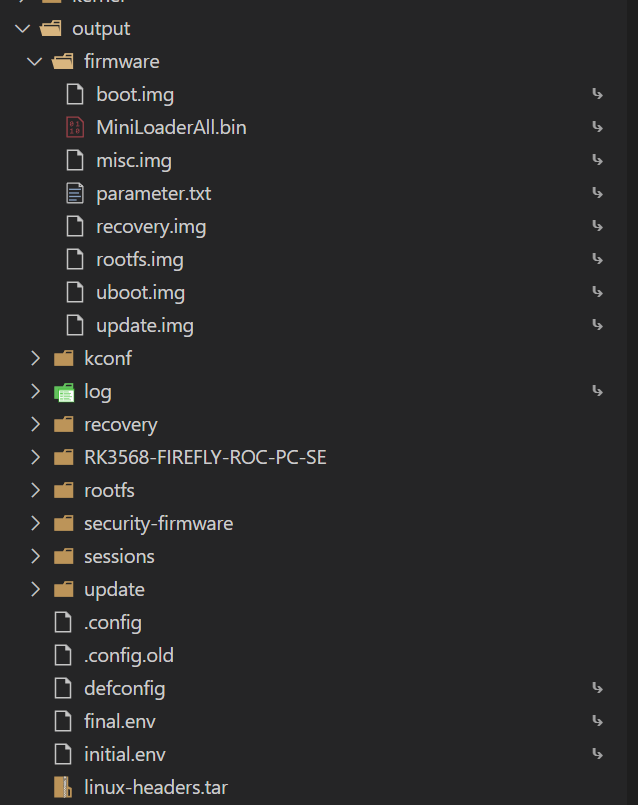
正常编译完成后,会在 output 目录下生成各个镜像文件。接下来需要编辑某些镜像,将其中的文件替换或添加为我们自己的文件。
6. 修改 boot.img
将 boot.img 中的 Linux 内核镜像替换为 AxVisor 镜像:
进入 SDK 固件目录
cd <SDK_PATH>/output/firmware
挂载和修改 boot.img
# 创建挂载点
mkdir -p boot

# 挂载 boot.img
sudo mount boot.img boot

# 复制 AxVisor 镜像,替换原 Linux 内核
sudo cp <AXVISOR_PATH>/target/aarch64-unknown-none-softfloat/release/axvisor.bin boot/Image-5.10.198

# 卸载
sudo umount boot
7. 添加客户机配置到根文件系统
在文件系统加载模式下,需要将客户机镜像和配置文件添加到根文件系统中。AxVisor 默认从 /guest 目录加载客户机文件。
挂载根文件系统
# 创建挂载点
mkdir -p rootfs

# 挂载 rootfs.img
sudo mount rootfs.img rootfs
创建 AxVisor 客户机目录结构
# 创建目录结构
sudo mkdir -p rootfs/guest/configs
sudo mkdir -p rootfs/guest/images
复制客户机配置文件
# 复制配置文件
sudo cp <AXVISOR_PATH>/tmp/configs/arceos-aarch64-rk3568-smp1.toml rootfs/guest/configs/
sudo cp <AXVISOR_PATH>/tmp/configs/linux-aarch64-rk3568-smp1.toml rootfs/guest/configs/
复制客户机镜像
# 复制客户机镜像
sudo cp <AXVISOR_PATH>/tmp/images/roc-rk3568-pc_arceos/roc-rk3568-pc rootfs/guest/images/roc-rk3568-pc-arceos
sudo cp <AXVISOR_PATH>/tmp/images/roc-rk3568-pc_linux/roc-rk3568-pc rootfs/guest/images/roc-rk3568-pc-linux
卸载文件系统
sudo umount rootfs
文件系统中的目录结构如下:
/guest/
   ├── configs/
   │   ├── arceos-aarch64-rk3568-smp1.toml
   │   └── linux-aarch64-rk3568-smp1.toml
   └── images/
       ├── roc-rk3568-pc-arceos
       └── roc-rk3568-pc-linux
8. 打包完整固件
在 SDK 目录中执行打包命令:
cd <SDK_PATH>
./build.sh updateimg
打包完成后,固件位于 <SDK_PATH>/output/update/Image/update.img。
三、烧录到开发板
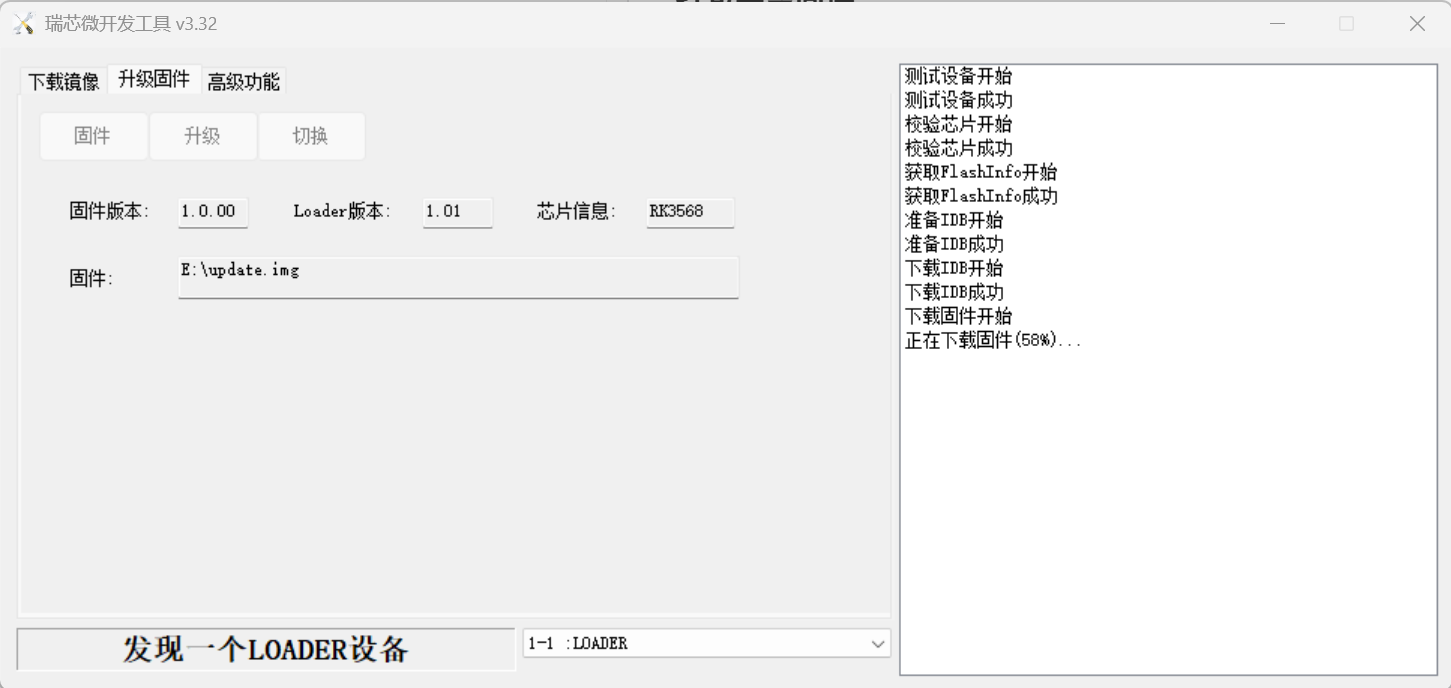
使用瑞芯微官方烧写工具将完整的 update.img 固件烧写到开发板。
烧写步骤:
- 切换至
升级固件页 - 按
固件按钮,选择要升级的update.img文件 - 升级工具会显示详细的固件信息
- 按
升级按钮开始升级 - 如果升级失败,可尝试使用切换升级存储器的方法
烧写完成后,重新上电启动开发板即可运行 AxVisor。
运行验证
完成部署后,需要对 AxVisor 的运行状态进行验证,确保虚拟化系统正常工作。本节将详细介绍连接方法、启动过程验证以及常见问题的处理方法。
串口连接
在验证运行状态之前,需要通过串口连接到 ROC-RK3568-PC 开发板。
安装串口工具
在主机上安装串口通信工具:
# Ubuntu/Debian 系统(推荐)
sudo apt install picocom

# 或者使用 minicom
sudo apt install minicom
连接��设置
ROC-RK3568-PC 的串口参数:
- 波特率:1500000 (1.5Mbps)
- 数据位:8
- 停止位:1
- 校验位:无
使用 picocom 连接:
# 查看串口设备
ls /dev/ttyUSB*

# 连接串口(根据实际设备调整)
picocom -b 1500000 --imap lfcrlf /dev/ttyUSB0
使用 minicom 连接:
# 配置 minicom
sudo minicom -s

# 或者直接连接
sudo minicom -D /dev/ttyUSB0 -b 1500000
退出 picocom: Ctrl+A 然后按 Ctrl+X
退出 minicom: Ctrl+A 然后按 Q
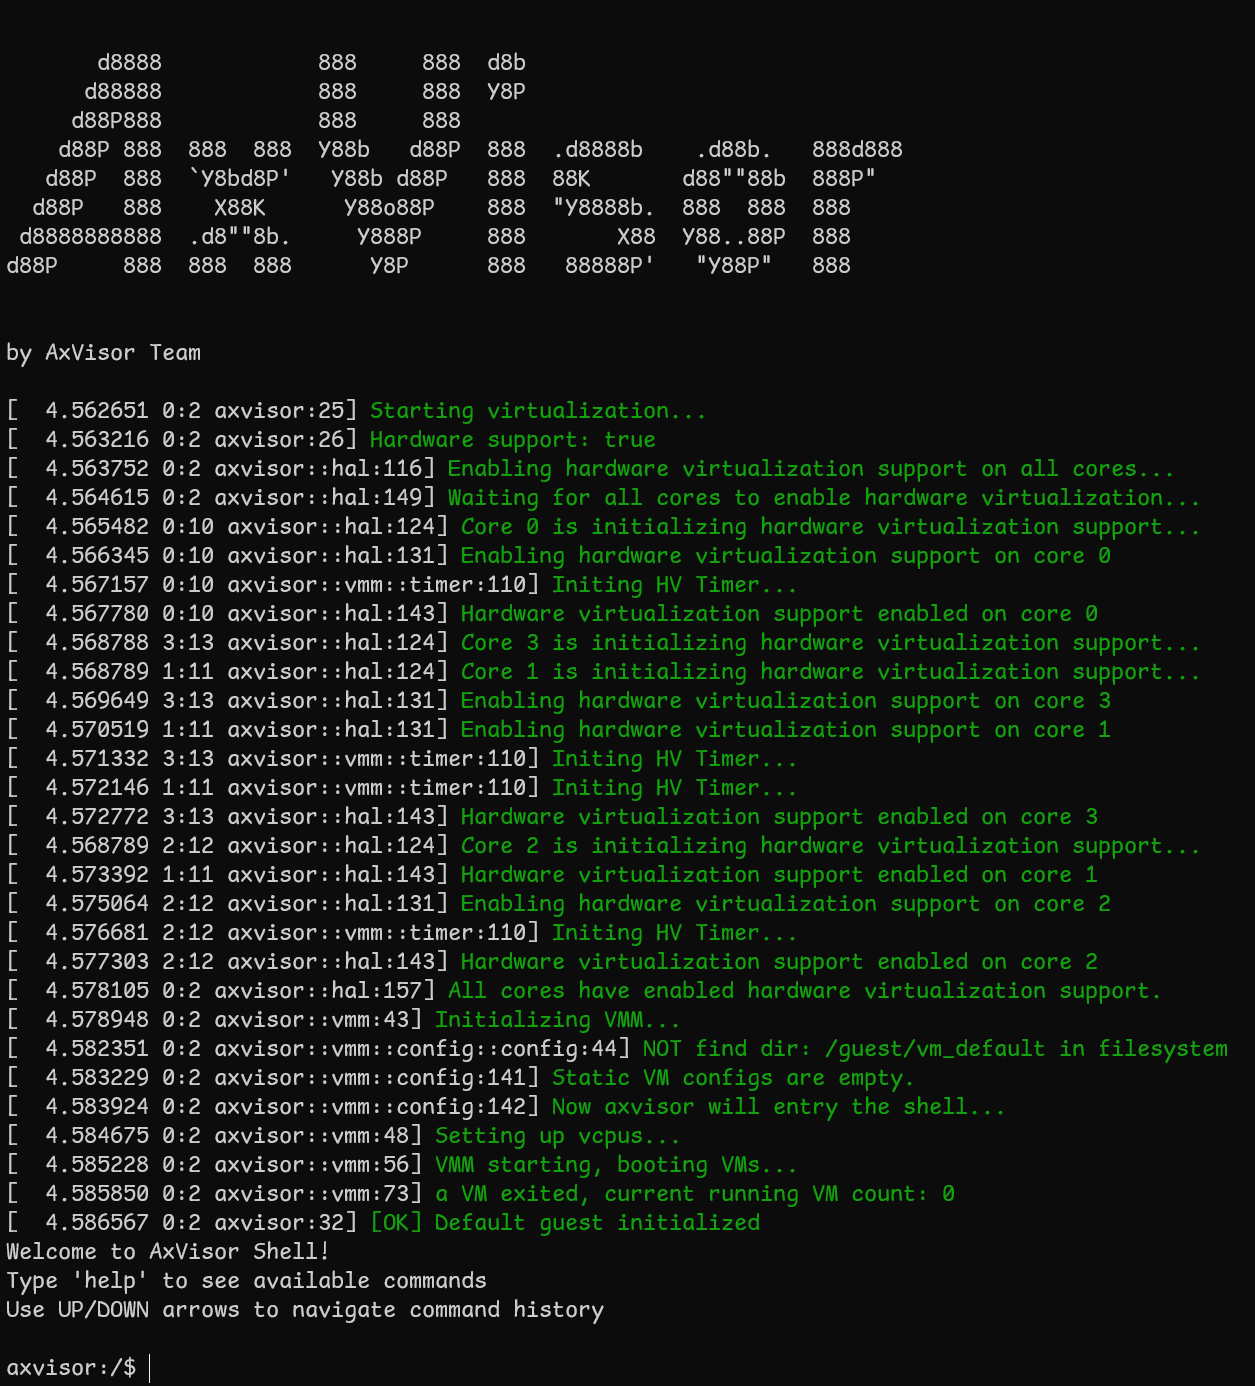
启动过程验证
AxVisor 启动信息
开发板上电后,应该能看到以下启动信息:
启动客户机
进入 AxVisor shell 后,可以通过以下命令创建和启动客户机:
# 列出可用的客户机配置
ls /guest/configs/

# 创建 ArceOS 客户机实例
vm create /guest/configs/arceos-aarch64-rk3568-smp1.toml

# 启动客户机(VM ID 为 1)
vm start 1

# 创建 Linux 客户机实例
vm create /guest/configs/linux-aarch64-rk3568-smp1.toml

# 启动客户机(VM ID 为 2)
vm start 2
限制说明:当前版本中,Linux 客户机启动后无法返回 AxVisor shell,如需操作其他客户机需要重启开发板。
客户机运行状态
ArceOS 客户机启动信息:
axvisor:/$ vm start 1
[146.447613 0:2 axvisor::vmm::vcpus:341] Initializing VM[1]'s 1 vcpus
[146.448295 0:2 axvisor::vmm::vcpus:390] Spawning task for VM[1] VCpu[0]
[146.449009 0:2 axvisor::vmm::vcpus:405] VCpu task Task(14, "VM[1]-VCpu[0]") created cpumask: [2, ]
[146.449928 0:2 axvm::vm:416] Booting VM[1]
✓ VM[1] started successfully
axvisor:/$ [146.458789 2:14 axvisor::vmm::vcpus:428] VM[1] boot delay: 0s
[146.459412 2:14 axvisor::vmm::vcpus:431] VM[1] VCpu[0] waiting for running
[146.460146 2:14 axvisor::vmm::vcpus:434] VM[1] VCpu[0] running...
fdt                     : 0x1aa00000
EL                      : 1
_start                  : 0xffff800000000000
stack                   : 0xffff800000088000
loader                  : [0xac34000, 0xac443c0)
BootTable space         : [0xad09698 --)
code                    : [0xffff800000000000, 0xffff800020000000) -> [0xac00000, 0x2ac00000)
ram                     : 0xffff90000ac00000-> 0xac00000
debug                   : 0xffff9000fe660000-> 0xfe660000
eq                      : [0x0, 0x8000000000)
Table                   : 0x000000000ad0a000
Table size              : 0x8968
jump to                 : 0xffff800000002494
SomeHAL booting...
Power management method : SMC
Goto main...

       d8888                            .d88888b.   .d8888b.
      d88888                           d88P" "Y88b d88P  Y88b
     d88P888                           888     888 Y88b.
    d88P 888 888d888  .d8888b  .d88b.  888     888  "Y888b.
   d88P  888 888P"   d88P"    d8P  Y8b 888     888     "Y88b.
  d88P   888 888     888      88888888 888     888       "888
 d8888888888 888     Y88b.    Y8b.     Y88b. .d88P Y88b  d88P
d88P     888 888      "Y8888P  "Y8888   "Y88888P"   "Y8888P"

arch = aarch64
platform = aarch64-dyn
target = aarch64-unknown-none-softfloat
build_mode = release
log_level = info
smp = 1

[146.915558 axruntime:136] Logging is enabled.
[146.916058 axruntime:137] Primary CPU 0 started, arg = 0xacee000.
[146.916725 axruntime:140] Found physcial memory regions:
[146.917307 axruntime:142]   [PA:0xac00000, PA:0xac01000) reserved (READ | WRITE | RESERVED)
[146.918168 axruntime:142]   [PA:0xac01000, PA:0xac2c000) .text (READ | EXECUTE | RESERVED)
[146.919023 axruntime:142]   [PA:0xac2c000, PA:0xac45000) .rodata (READ | RESERVED)
[146.919818 axruntime:142]   [PA:0xac45000, PA:0xac48000) .data .tdata .tbss .percpu (READ | WRITE | RESERVED)
[146.920822 axruntime:142]   [PA:0xac88000, PA:0xacc8000) boot stack (READ | WRITE | RESERVED)
[146.921700 axruntime:142]   [PA:0xacc8000, PA:0xacee000) .bss (READ | WRITE | RESERVED)
[146.922534 axruntime:142]   [PA:0xacee000, PA:0xad13000) reserved (READ | WRITE | RESERVED)
[146.923399 axruntime:142]   [PA:0xad13000, PA:0x1ac00000) free memory (READ | WRITE | FREE)
[146.924261 axruntime:142]   [PA:0xfe660000, PA:0xfe661000) mmio (READ | WRITE | DEVICE | RESERVED)
[146.925180 axruntime:220] Initialize global memory allocator...
[146.925825 axruntime:221]   use TLSF allocator.
[146.926435 axmm:101] Initialize virtual memory management...
[146.935554 axruntime:160] Initialize platform devices...
[147.031697 axruntime:198] Primary CPU 0 init OK.
Hello, world!
[147.032345 2:14 axvisor::vmm::vcpus:513] VM[1] run VCpu[0] SystemDown
[147.033035 2:14 axvm::vm:453] Shutting down VM[1]
[147.033570 2:14 axvisor::vmm::vcpus:564] VM[1] VCpu[0] stopping because of VM stopping
[147.034389 2:14 axvisor::vmm::vcpus:570] VM[1] VCpu[0] last VCpu exiting, decreasing running VM count
[147.035331 2:14 axvisor::vmm::vcpus:574] VM[1] state changed to Stopped
[147.036050 2:14 axvisor::vmm::vcpus:584] VM[1] VCpu[0] exiting...
Linux 客户机启动信息:
axvisor:/$ vm start 2
[206.542173 0:2 axvisor::vmm::vcpus:341] Initializing VM[2]'s 1 vcpus
[206.542853 0:2 axvisor::vmm::vcpus:390] Spawning task for VM[2] VCpu[0]
[206.543573 0:2 axvisor::vmm::vcpus:405] VCpu task Task(15, "VM[2]-VCpu[0]") created cpumask: [0, ]
[206.544495 0:2 axvm::vm:416] Booting VM[2]
✓ VM[2] started successfully
axvisor:/$ [206.545313 0:15 axvisor::vmm::vcpus:428] VM[2] boot delay: 5s
[211.545942 0:15 axvisor::vmm::vcpus:431] VM[2] VCpu[0] waiting for running
[211.546673 0:15 axvisor::vmm::vcpus:434] VM[2] VCpu[0] running...
[  211.551621] Booting Linux on physical CPU 0x0000000000 [0x412fd050]
[  211.551643] Linux version 5.10.198 (runner@s1lqc) (firefly: 34d433bc5e75/2511210905) (sdk version: rk356x_linux5.10_release_20241220_v1.4.0c.xml) (aarch64-none-linux-gnu-gcc (GNU Toolchain for the A-profile Architecture 10.3-2021.07 (arm-10.29)) 10.3.1 20210621, GNU ld (GNU Toolchain for the A-profile Architecture 10.3-2021.07 (arm-10.29)) 2.36.1.20210621) #16 SMP Fri Nov 21 09:05:49 CST 2025

................

Ubuntu 20.04.6 LTS firefly ttyFIQ0

firefly login: root (automatic login)

/etc/update-motd.d/30-sysinfo: line 152: cannot create temp file for here-document: Read-only file system
/etc/update-motd.d/30-sysinfo: line 153: cannot create temp file for here-document: Read-only file system
/etc/update-motd.d/30-sysinfo: line 172: cannot create temp file for here-document: Read-only file system
/etc/update-motd.d/30-sysinfo: line 173: cannot create temp file for here-document: Read-only file system
/etc/update-motd.d/30-sysinfo: line 174: cannot create temp file for here-document: Read-only file system
/etc/update-motd.d/30-sysinfo: line 186: cannot create temp file for here-document: Read-only file system
/etc/update-motd.d/30-sysinfo: line 187: cannot create temp file for here-document: Read-only file system
/etc/update-motd.d/30-sysinfo: line 189: cannot create temp file for here-document: Read-only file system
/etc/update-motd.d/30-sysinfo: line 190: cannot create temp file for here-document: Read-only file system
 _____ _           __ _
|  ___(_)_ __ ___ / _| |_   _
| |_  | | '__/ _ \ |_| | | | |
|  _| | | | |  __/  _| | |_| |
|_|   |_|_|  \___|_| |_|\__, |
                        |___/
Welcome to Ubuntu 20.04.6 LTS (GNU/Linux 5.10.198 aarch64)

 * Documentation:  http://wiki.t-firefly.com
 * Management:     http://www.t-firefly.com

System information as of Mon Oct 20 02:53:58 UTC 2025

Up time:
IP:

The programs included with the Ubuntu system are free software;
the exact distribution terms for each program are described in the
individual files in /usr/share/doc/*/copyright.

Ubuntu comes with ABSOLUTELY NO WARRANTY, to the extent permitted by
applicable law.

The programs included with the Ubuntu system are free software;
the exact distribution terms for each program are described in the
individual files in /usr/share/doc/*/copyright.

Ubuntu comes with ABSOLUTELY NO WARRANTY, to the extent permitted by
applicable law.

root@firefly:~#